A DIY Tangled party theme. Decor was designed and handmade by me, over and over again. Curious about doing a night-themed version of this someday when my fingers detangle themselves.
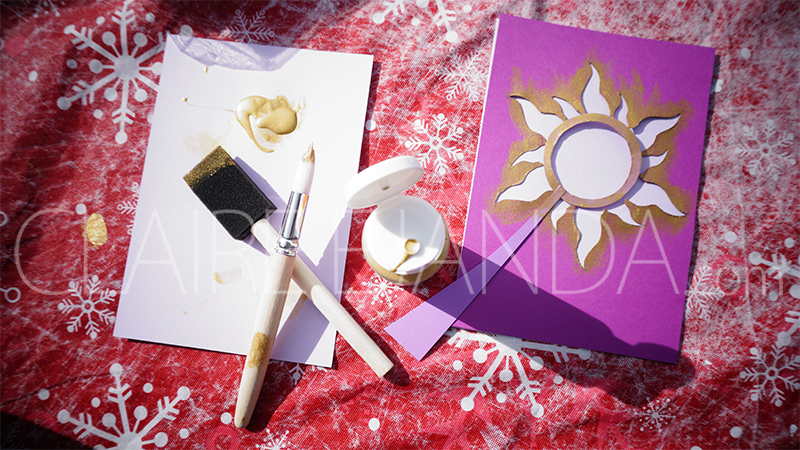
Project One: The Sun Symbol Stencil
This was a stencil I sketched and cut out on card stock so that I could quickly paint Tangled’s sun symbol on everything from cards to banners to flags.
Project Two: The Frying Pan
Using a gold metallic marker, I wrote welcome messages on frying pans made of paper plates. I placed one on every table to greet guests. Another possible use for these frying pans would be to use them as easy-to-identify placemats for when those small plates of birthday cake are being distributed to guests.
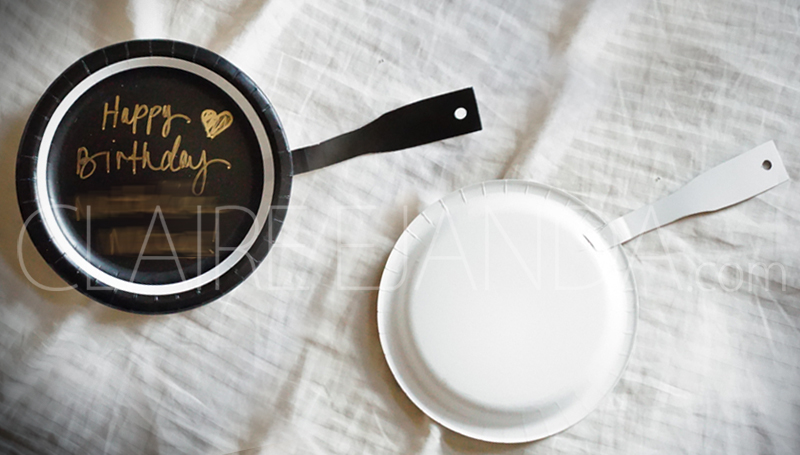
Seen below, it took me several attempts to figure out how to orient the brush on the plate. To correctly trace the frying pan handles, you have to have the narrow end of the brush extend to the outer edge of the plate. Hole punching the wide end of the handle also made it more authentic looking.

Something to mention, a small detail but big difference, was that when I tried creating this same frying pan with paper plates that were one solid color, they looked flimsy and unconvincing. The plate I went with, it was actually the white rim lining the inside of the plate which gave it an illusion of being deep set – making the plate look more pan-like than its one color counterpart. These paper plates were on sale, $1.13 for 10, at Target.
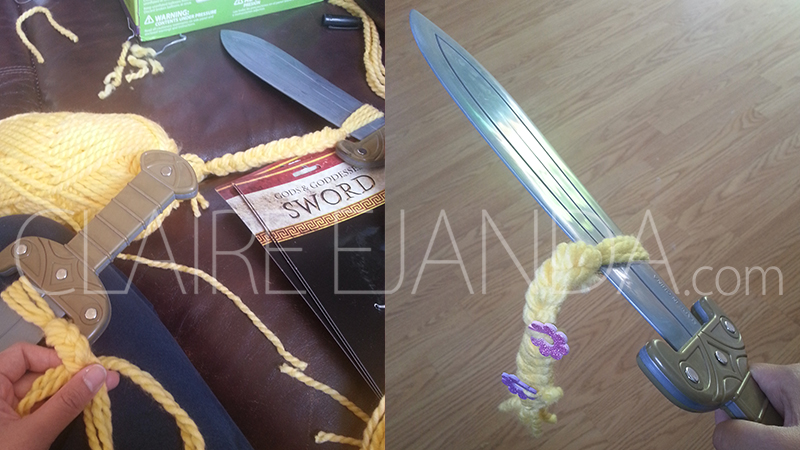
Project Three: The Dagger That Saved Rapunzel
I gave these “daggers” out as party favors and it was really popular with the boys and the girls. In fact, I underestimated the demand and didn’t have enough to go around. The teens couldn’t help but get in on this as well.
After I finished making the last one, my 3 year old then decided it was a great time to uncover the flaw and asked, “How come the yarn isn’t brown?” The swords were $2.99 each, at Party City. The foam flower stickers were $2.99 for 55+ pieces, at Micheals.
Project Four: The Pascal Party Blowouts
This had to be my most favorite thing to make because of how they turned out. Seeing them in action at the party, I would easily call these Pascal party blowouts the heart of the whole Tangled decor theme.
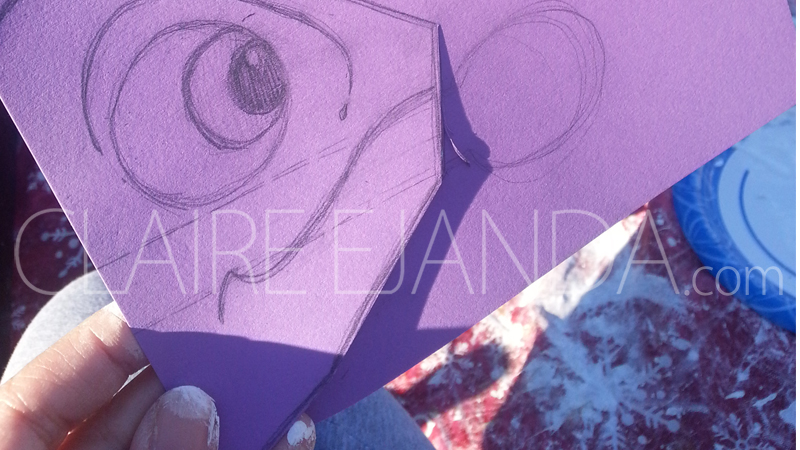
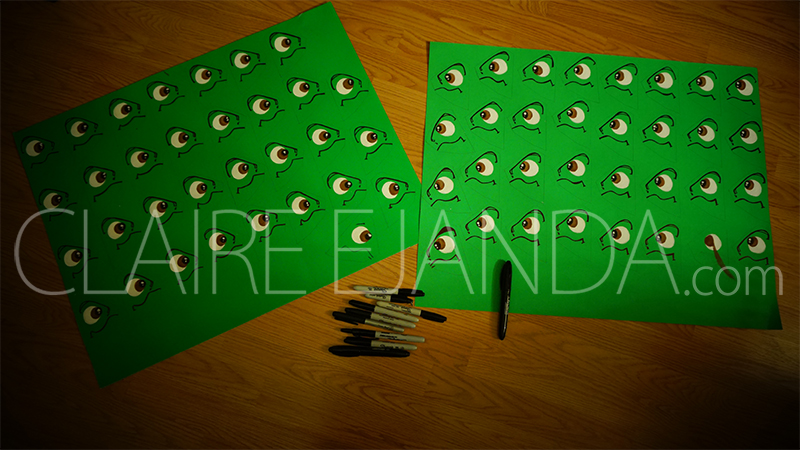
I was happy that I went with the green poster board as opposed to green construction paper for Pascal’s head. Though green construction paper would have been easier to cut, the green poster board was sturdy and more vibrant. Because I had to individually paint and draw an army of Pascal heads, the poster board helped me lay down the elements quickly from face to face. Notice one poster board has the head facing left and the other has the head facing right. That is necessary because the party blower is placed in between the left and right pieces, before being glued together.
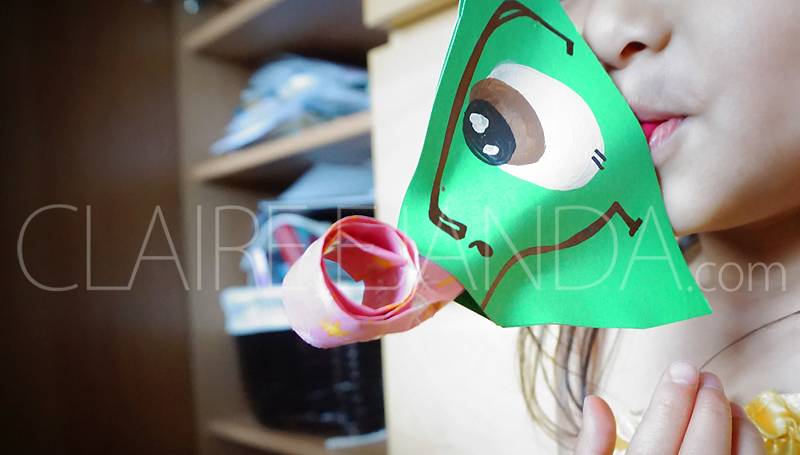
For Pascal’s tongue, I was able to find pink party blowouts with the yellow sun pattern. The party blowouts were $1.59 for an 8pack on Amazon. My only regret was that I went too cheap with those party blowouts and they didn’t last long in the mouths of salivating children.

Project Five: The Rapunzel Hairbands
These Rapunzel hair party favors turned out really pretty. Because these braids were constructed using yellow yarn WIRE, it allowed me to “pose” the braid which also gave it character. I also bought yellow cloth tape to wrap around the ends and avoid the chance of anyone getting poked by an exposed wire.
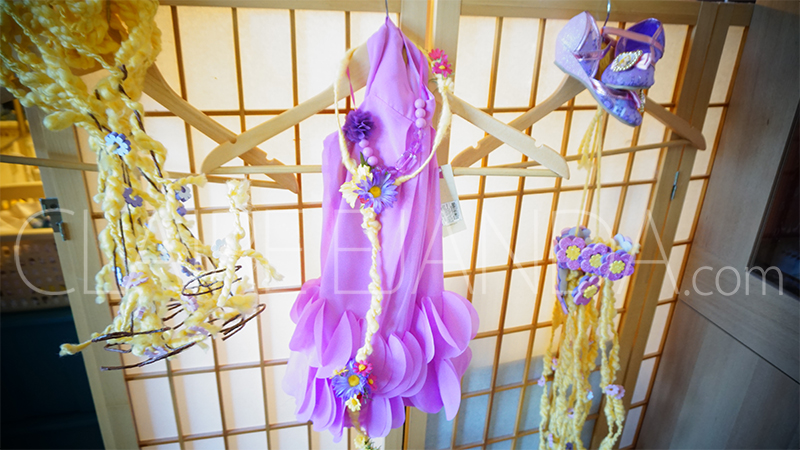
To make it wearable, I opted to attach these braids to a halo that was crafted with the same yarn wire as the braid. I went with a halo instead of a headband because the weight of the braid caused the headband to slide off. Turns out that this halo was also perfect because it could be custom fitted to guests upon their arrival – with the braid later tied on to it using a quick and simple knot.
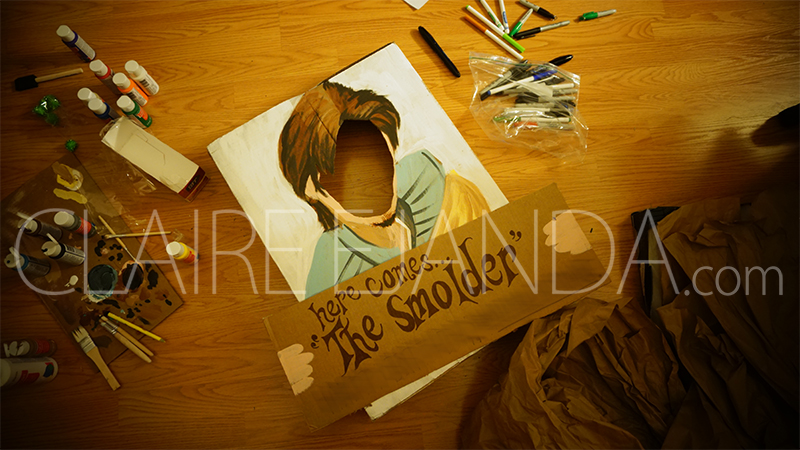
Project Six: The Smoldering Photo Op
This was inspired by the scene where Flynn, wrapped in Rapunzel’s hair, attempts to flirt his way free. The supplies I used are seen in the photo and the making of it is pretty self-explanatory. Hand-painted, cardboard cut-out and glued. We passed this around from table to table and guests were asked to give their best imitation of Flynn’s infamous “Smolder” expression after seeing a photo of the actual scene. The results were hilarious.
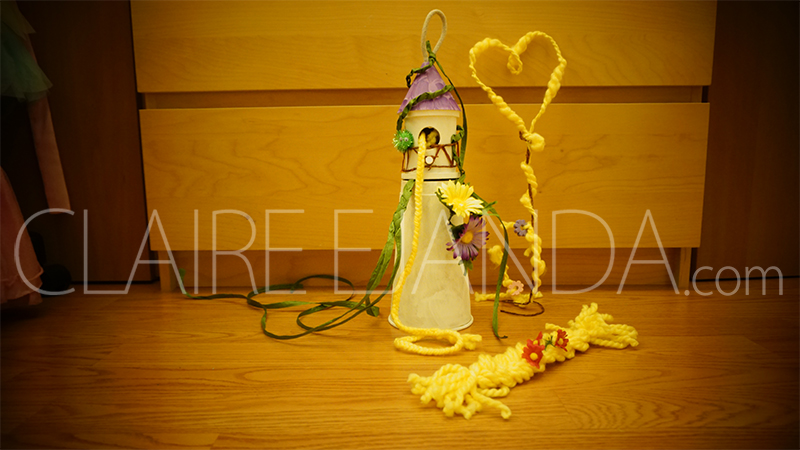
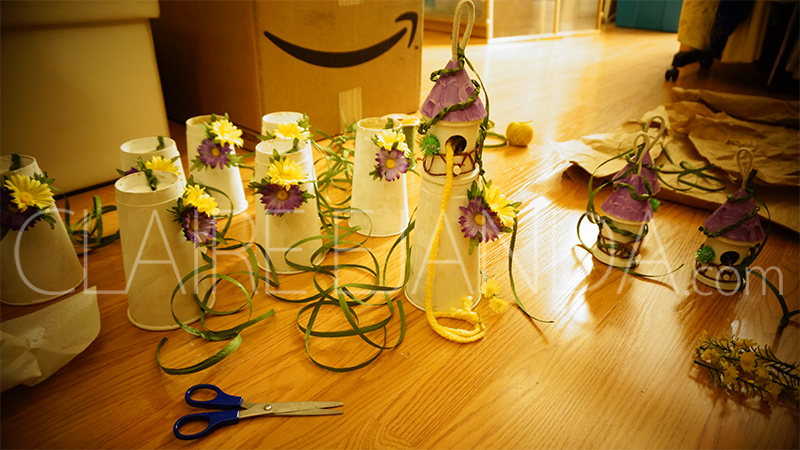
Project Seven: The Tangled Tower Centerpieces
Now this last project, I will go into detail with because these original tower centerpieces were the most asked about piece of decor that day. They were also the most labor-intensive.
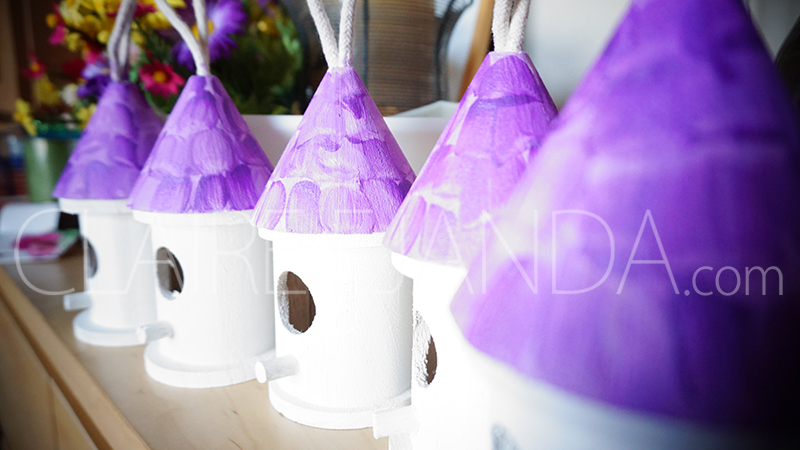
To construct the Tangled tower centerpieces, here is what I did: For the TOP half of the tower, 1) I began with painting the BIRDHOUSES from natural to white. There are about 3 coats of white on there. To give the roof shingles the texture that you see below, I did not wait for the white paint to dry when I applied the purple paint. The purple paint was applied using a flat round brush, pressing and dragging the brush down in short, tiled strokes. The birdhouses were $1.99 each at Michaels.
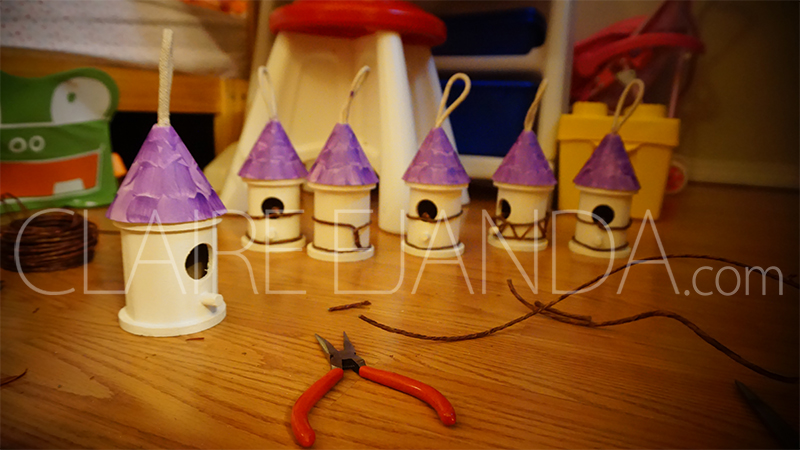
For the WOOD accents, instead of using brown paint, I looked for other wood alternatives to give the centerpiece dimension and texture. For the wood frame, 2) I hand-bent these hemp-wrapped wires around the birdhouse. Then, 3) I inter-weaved a more flexible, wood-like raffia, between and along the span of the hemp wire frame to add greater detail to the wood.
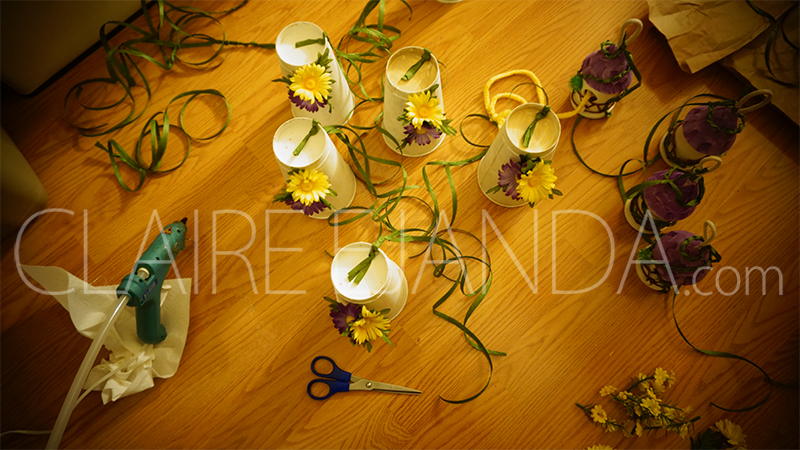
For the BOTTOM half of the tower, 4) I painted Jamba Juice cups (size L) with alternating coats of white and cream. Each underlying coat was left slightly wet to allow the white and cream to mix, therefore, giving the tower a rustic look.

For the VINES, 5) beginning with a knot at the top, I partially braided 3 arm-length strands of green raffia, 4 inches down, before knotting it closed. With a glue-gun, I glued the top knot of this green raffia braid to the underside of the cup. I left the unbraided dangling ends of this green raffia braid untrimmed so these strands get a little tangled with each other on the table’s surface. This was done to create a variation in vine movement to give the centerpiece the kind of randomness that makes it less cookie-cutter from table to table.
Moving on to the FLOWERS, 6) I poked a hole on the side of each cup. Slide the yellow and purple flowers into them. If you haven’t yet noticed, the flowers are the same ones I used for the headband in Project Five.
Back to the TOP half of the tower, there were two styles of green raffia vines that I affixed to the roof. 7) The FIRST vine was a 2-strand twist designed to wrap around the upper half of the tower. After you have wrapped this 2-strand twist around the birdhouse for the last time, be sure to tape off and secure its loose end UNDER the top half of the tower. 8) The SECOND vine was a single strand that I let drop down from the very top of the roof to the bottom of the tower. This vine was then trimmed to slightly graze the table top.
Rapunzel’s HAIR was made from braided yellow yarn. 9) The top part of the hair was tucked into the birdhouse entry while the bottom part of the hair was looped at the floor. The loops were tied together with yellow string. This gave the bottom of the hair some weight. Without this, the centerpiece would be more likely to fall over from the rigidity of the braid. Also, the circling of the braid at the bottom of the tower would pull the entire design in, whereas the vines, in contrast, pushed the design out.
The finishing touch was 10) a small green sparkly POMPOM which I glued googly-eyes onto. I went with the pompom for Pascal to give only an impression of Rapunzel’s cartoon sidekick. This would allow the piece to be a bit playful and cartoonish, without abandoning its lightly elegant and rustic elements. Below, you see a close-up of the finished product.

Not wanting to waste supplies, I continued to find creative ways to use my leftover yarn, yarn-wires, flowers and hemp-wires. What I ended up using them for was hair-themed accents to accompany the tower – giving the centerpiece an animated personality.